美好生活從測驗開始
不寫自動測試案例的程式設計師不是一個好的測試工程師。我們鼓勵所有的專案在啟動最初,就建立完整的自動化測試案例。隨著專案的發展,前期的投入將會得到數百倍的回報。
我們延續上一小節的例子,來看看一個如何使用fibjs 寫測試案例。
1
2
3
4
5
6
7
8
9
10
11
12
13
14
15
16
17
18
19
20
21const http = require('http');
const path = require('path');

var hello_server = {
    '/:name(fibjs.*)': (req, name) => {
        req.response.write('hello, ' + name + '. I love you.');
    },
    '/:name': (req, name) => {
        req.response.write('hello, ' + name);
    }
};

var root_server = {
    '/hello': hello_server,
    '/bonjour': hello_server,
    '*': http.fileHandler(path.join(__dirname, 'web'))
};

var svr = new http.Server(8080, root_server);

svr.start();
一個空的測試框架
我們先從一個最基礎的測試框架開始搭建:
1
2
3
4
5
6
7
8
9
10var test = require('test');
test.setup();

describe('hello, test', () => {
    it('a empty test', () => {

    });
});

test.run();
儲存為test.js後,在命令列執行fibjs test.js,會看到下面的輸出,一個基本的測試框架就寫好了。
1
2
3
4  hello, test
    √ a empty test

  √ 1 tests completed (0ms)
開始測試伺服器
因為我們需要測試http 伺服器,所以我們需要先啟動伺服器。測試案例會向伺服器發出請求,然後測試請求結果,來判斷伺服器是否符合需求:
1
2
3
4
5
6
7
8
9
10
11
12
13
14var test = require('test');
test.setup();

var http = require('http');

describe('hello, test', () => {
    it('hello, fibjs', () => {
        var r = http.get('http://127.0.0.1:8080/hello/fibjs');
        assert.equal(r.statusCode, 200);
        assert.equal(r.data.toString(), 'hello, fibjs. I love you.');
    });
});

test.run();
在這段程式碼中,我們透過驗證http.get 的結果是否是我們期望的結果,來判斷伺服器邏輯是否正常。按照這個範例,我們可以很快完成一組測試,我們同時優化了一下程式碼:
1
2
3
4
5
6
7
8
9
10
11
12
13
14
15
16
17
18
19
20
21
22
23
24
25
26
27
28
29
30var test = require('test');
test.setup();

var http = require('http');

function test_get(url, rep) {
    var r = http.get('http://127.0.0.1:8080' + url);
    assert.equal(r.statusCode, 200);
    assert.equal(r.data.toString(), rep);
}

describe('hello, test', () => {
    it('hello, fibjs', () => {
        test_get('/hello/fibjs', 'hello, fibjs. I love you.');
    });

    it('hello, fibjs*', () => {
        test_get('/hello/fibjs-great', 'hello, fibjs-great. I love you.');
    });

    it('hello, JavaScript', () => {
        test_get('/hello/JavaScript', 'hello, JavaScript');
    });

    it('hello, v8', () => {
        test_get('/hello/v8', 'hello, v8');
    });
});

test.run();
用例的分組管理
下面我們來增加bonjour 的測試,雖然bonjour 和hello 是同一組服務,但是因為路徑發生了變化,我們同樣需要驗證服務的正確性,這一次,為了能更好地管理用例,我們對測試用例進行了分組,同時,因為hello 和bonjour 的測試內容是相同的,我們再次優化了程式碼,用同一套程式碼測試兩組服務:
1
2
3
4
5
6
7
8
9
10
11
12
13
14
15
16
17
18
19
20
21
22
23
24
25
26
27
28
29
30
31
32
33
34
35
36
37var test = require('test');
test.setup();

var http = require('http');

function test_get(url, rep) {
    var r = http.get('http://127.0.0.1:8080' + url);
    assert.equal(r.statusCode, 200);
    assert.equal(r.data.toString(), rep);
}

describe('hello, test', () => {
    function test_hello(hello) {
        describe(hello + ' test', () => {
            it('fibjs', () => {
                test_get('/' + hello + '/fibjs', 'hello, fibjs. I love you.');
            });

            it('fibjs*', () => {
                test_get('/' + hello + '/fibjs-great', 'hello, fibjs-great. I love you.');
            });

            it('JavaScript', () => {
                test_get('/' + hello + '/JavaScript', 'hello, JavaScript');
            });

            it('v8', () => {
                test_get('/' + hello + '/v8', 'hello, v8');
            });
        });
    }

    test_hello('hello');
    test_hello('bonjour');
});

test.run();
透過用例分組,我們可以更清楚地查看測試結果,也可以輕鬆地跳過並單獨測試一組用例,加快開發測試速度。以下是這一輪測試的結果:
1
2
3
4
5
6
7
8
9
10
11
12
13  hello, test
    hello test
      √ fibjs
      √ fibjs*
      √ JavaScript
      √ v8
    bonjour test
      √ fibjs
      √ fibjs*
      √ JavaScript
      √ v8

  √ 8 tests completed (3ms)
根據我們的伺服器設計,我們還有一組靜態檔案服務,按照上面的範例,相信你很快可以補寫出這部分測試案例。
一鍵測試
經過上面的介紹,我們已經可以很快地建立起測試案例了。但是為了使用這個測試腳本,必須先啟動伺服器,這樣很不方便,我們希望執行test.js能夠直接完成測試。我們可以用以下程式碼來實現:
1
2
3
4
5
6
7
8
9
10
11
12
13
14
15
16
17
18
19
20
21
22
23
24
25
26
27
28
29
30
31
32
33
34
35
36
37
38
39
40
41
42
43var test = require('test');
test.setup();

var http = require('http');

var coroutine = require('coroutine');
coroutine.start(() => {
    run('./main.js');
});
coroutine.sleep(100);

function test_get(url, rep) {
    var r = http.get('http://127.0.0.1:8080' + url);
    assert.equal(r.statusCode, 200);
    assert.equal(r.data.toString(), rep);
}

describe('hello, test', () => {
    function test_hello(hello) {
        describe(hello + ' test', () => {
            it('fibjs', () => {
                test_get('/' + hello + '/fibjs', 'hello, fibjs. I love you.');
            });

            it('fibjs*', () => {
                test_get('/' + hello + '/fibjs-great', 'hello, fibjs-great. I love you.');
            });

            it('JavaScript', () => {
                test_get('/' + hello + '/JavaScript', 'hello, JavaScript');
            });

            it('v8', () => {
                test_get('/' + hello + '/v8', 'hello, v8');
            });
        });
    }

    test_hello('hello');
    test_hello('bonjour');
});

process.exit(test.run());
這段程式碼的第6~10 行裡,我們增加了一段啟動main.js的程式碼,並且稍微等一下,之後再開始測試。
代碼覆蓋檢查
好的測試案例需要考慮測試案例需要覆蓋業務的每個分支,以確定業務執行正確,此時可以使用程式碼覆蓋檢查,來確定測試是否完整。
這個過程很簡單,只需要在測試的時候增加--cov 參數即可:
1fibjs --cov test
測試完成後,會在目前目錄產生一個fibjs-xxxx.lcov 的日誌文件,此時需要分析日誌並產生報告:
1fibjs --cov-process fibjs-xxxx.lcov out
便可以在out 目錄產生一組分析報告。進入目錄查閱,可以看到以下頁面:
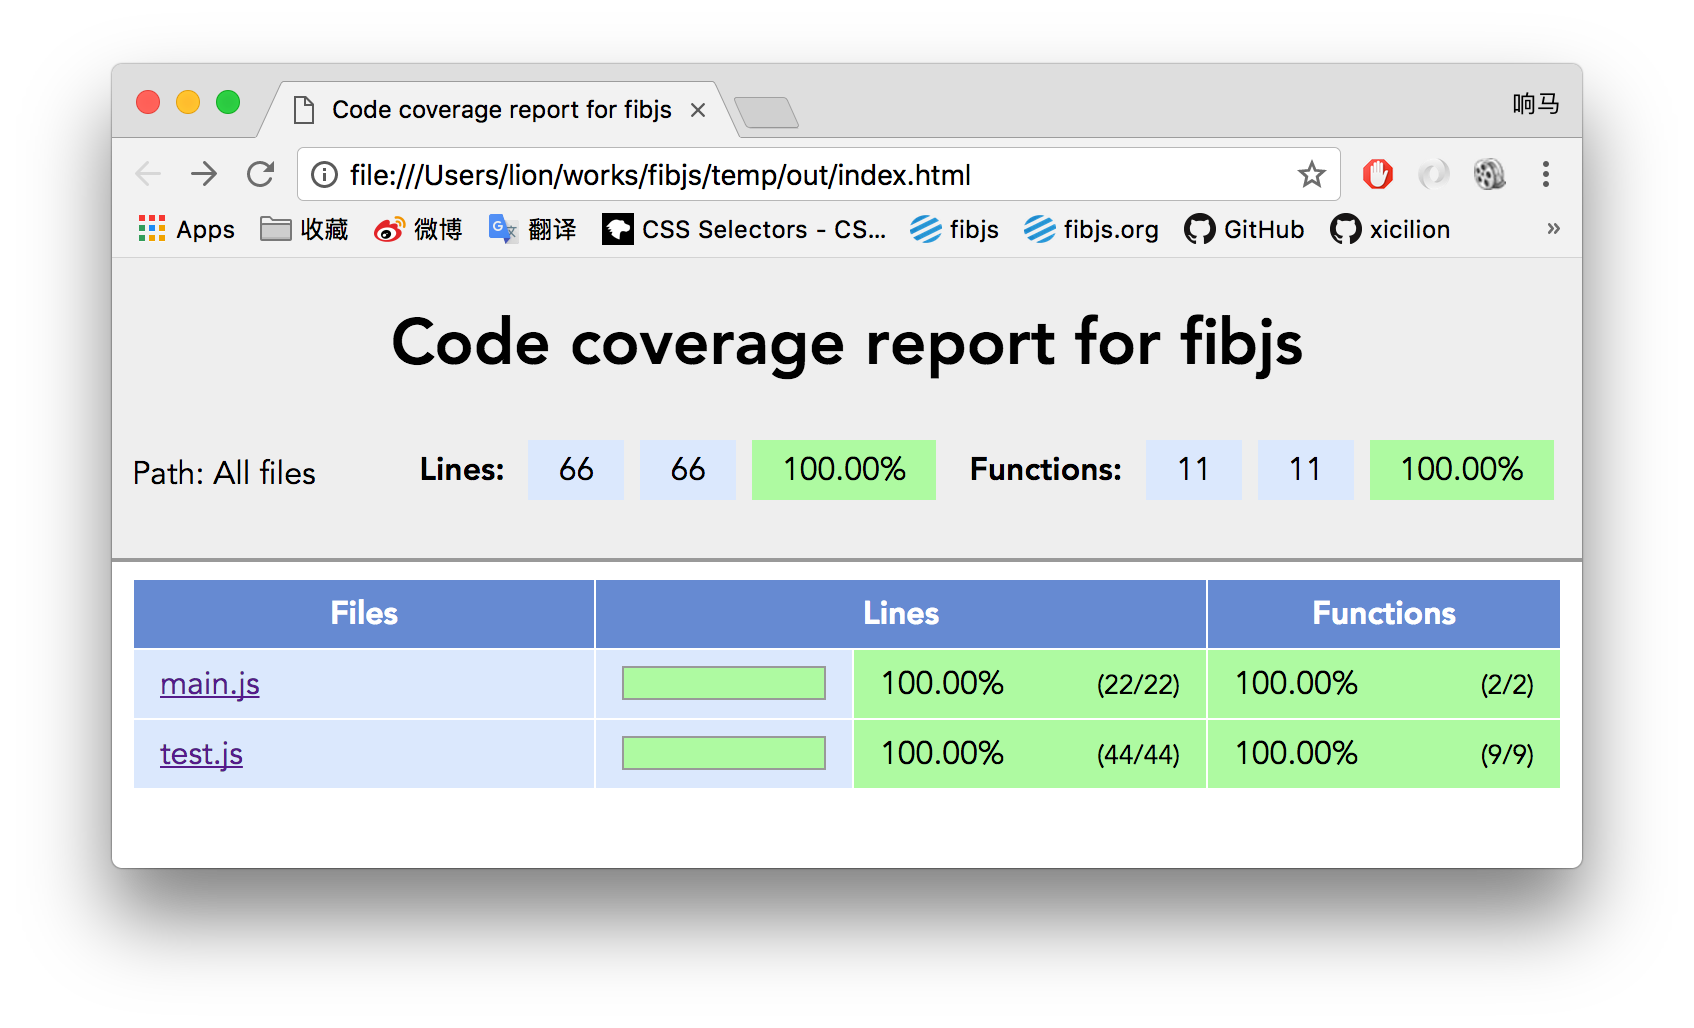 可以看到,
可以看到,main.js的程式碼覆蓋達到了100%,表示測試完全涵蓋了業務邏輯。點擊main.js進一步可以看到更詳細的報告。
👉 【找出性能殺手】